

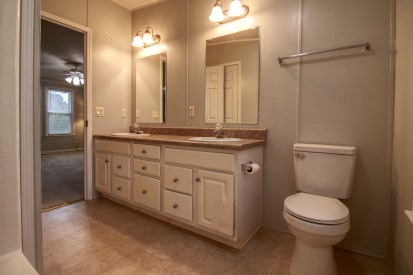
If you’ve ever tried to photograph a powder room or a compact master bath, you know the struggle. You back up as far as you can, press yourself against the doorframe, and still only manage to capture the edge of the vanity and a slice of the mirror.
Bathrooms are notoriously difficult to photograph. They are often the smallest rooms in the house, filled with reflective surfaces (mirrors, glass, tile), and lighting that can be tricky. Yet, a clean, bright, and spacious-looking bathroom is a huge selling point for potential buyers.
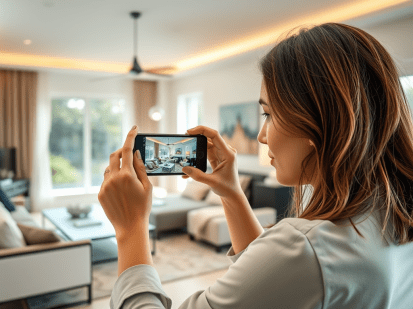
Whether you are a homeowner snapping quick shots for a listing or just looking to improve your interior photography skills, here is how to master the art of shooting small spaces.
1. It Starts with the Gear: Go Wide
The number one secret to shooting small spaces is a wide-angle lens. Standard camera lenses often zoom in too much, cutting off half the room.
- For Professionals: A lens in the 16-35mm range is the industry standard for real estate. It allows you to capture the vanity, toilet, and shower in a single frame without making the room look unnaturally distorted.
- For Smartphone Users: Most modern phones have a “0.5x” or “Ultra Wide” mode. Switch to this setting to instantly double your field of view. Just be careful not to tilt your phone too much, or the walls will look warped!
2. Master the “Doorway Lean”
In a tiny bathroom, you often physically cannot fit inside the room with your camera. The solution? Shoot from outside.
- Open the door fully and stand in the hallway.
- Use the doorframe to frame your shot, or crop it out later.
- The “One-Wall” Rule: In extremely tight half-baths, don’t try to get everything in one shot. Focus on the main feature (usually the vanity and mirror) and shoot it straight on.
3. Watch Your Reflections
Bathrooms are full of mirrors and glass shower doors, which means it is very easy to accidentally capture yourself in the photo.
- Angle Yourself: Instead of shooting straight at the mirror, step slightly to the side. This reflects the opposite wall rather than your camera reflection.
- Check the Shower Glass: Even clear glass can reflect your tripod or flash. A circular polarizer filter can help cut down on these glares.
4. Lighting is Key
Small bathrooms often have no windows, or just one small frosted one. This can make the room look yellow or dungeon-like.
- Turn on ALL the lights: Vanity lights, overhead fans, and shower lights.
- Mind the Color Temperature: If the vanity bulbs are bright orange (warm) and the overhead light is blue (cool), the photo will look messy. We recommend ensuring all bulbs are a matching “Daylight” or “Soft White” temperature before a shoot.
- Brighten the Shadows: At RCarrigan Media, we use High Dynamic Range (HDR) techniques to balance the bright lights with the dark corners, ensuring the room looks bright and inviting.
5. Declutter for Space
Nothing makes a small room look smaller than clutter. Before you snap the shutter:
- Clear the Counters: Remove toothbrushes, soap dispensers, and makeup.
- Hide the Essentials: Plungers, trash cans, and toilet brushes should be removed from the room entirely.
- Toilet Lid Down: Always. It’s the golden rule of real estate photography!
When to Call a Pro
While these tips can help you get a better shot, sometimes a space is just too tricky to capture without professional lighting and editing.
At RCarrigan Media, we specialize in making even the coziest spaces look their best. We use professional wide-angle equipment and advanced editing to ensure your bathroom looks bright, clean, and spacious—helping your listing stand out in the Catoosa County market.
Ready to list your home? Book your shoot with us today!


Leave a Reply
You must be logged in to post a comment.